THIS SITE REQUIRES JAVASCRIPT TO BE ENABLED TO BE VIEWED CORRECTLY. PLEASE ENABLE JAVASCRIPT! INSTRUCTIONS

Category Archives: Activities

Good Things Come to Kids Who Wait

It was cool among the Tamarisk, and they misted on me lightly. I sat, hugging me legs to my chest, chin resting on my knees. I resisted the urge to swish away the bugs exploring my ears and eyebrows. My mind wondered to other places. Lunch. School the next day. I ignored the sweat collecting in the crooks of my knees, and the way it tickled the backs of my calves. Why was I here again?


I am not a patient person. I am a now person. The first thing I look at when contemplating a new recipe is how long it takes to make. I want to know how the story ends by the last page of the second chapter. I can’t diet worth beans because I want the weight gone by the end of the first day.

I blame society.

In a world of immediate gratification and one-click buying options, where television images change on a screen an average of every three seconds, and where short bursts of information, facebook statuses, and tweets are the norm, I am required to multi-task constantly. In an effort to succeed in this world, I have developed the skills needed to thrive in the face of so much information, sacrificing any chance at a quiet moment. I grew up at the cusp of this great change in our social structure. My children, on the other hand, will be born into it. They will have few opportunities to learn the important skill of waiting, of delaying gratification, of thinking ahead, and of focusing for more than a minute. The implications of an entire society of young ones growing up constantly distracted are incredible, and affecting everything from the development of a young child’s brain, to how society functions in the future .

I am terrible at holding still—with one exception. When I was a teenager my dad taught me how rewarding it can be to sit in one spot and wait for the natural world to forget you’re there.

I remember the lesson well. We were taking a walk. He was an avid birder and was looking for spring migrants making their way north after the cold winter. We wandered along the edge of a lake, he stopping every few feet to eye some new movement among the Tamarisk that lined the beaches, me kicking at rocks and thinking about being somewhere else. I don’t remember my attitude, but knowing me I was bored, easily distracted, and likely hinted repeatedly at how far from the car we had come.

“Did you see that one?” he exclaimed while holding his binoculars to his eyes. “Western Tanager I think. What do you think?” he looked over at me to find that I didn’t even have my binoculars to my eyes. “What’s wrong with you?” he asked.

I mumbled some lame excuse about there not being that much to see in a bunch of boring old Tamarisk trees. He stared at me in incredulity for a long moment, then instructed me to follow him, and walked me to the Tamarisk grove.

“Here. Sit down in the middle. I’m leaving for 15 minutes. I want you to sit here. Don’t move. We’ll talk about what you see when I get back.”

Slightly peeved, but mostly curious at the strange request, I sat. In retrospect, he may have left me there in order to have 15 uninterrupted moments of bird watching—not because he expected me to learn any important outdoor skill.

But the lesson stuck; those fifteen minutes were unforgettable. Twenty years later I still find myself looking for opportunities to hold still somewhere and see who forgets me. Last week at the botanical gardens it was a lizard, who found my shoes were an excellent place to grab a quick lunch of bug debris. The hummingbirds were perched above my head, and bees worked the flowers around me, oblivious to my presence.

Game: Holding Still

When played as a game, this skill isn’t too hard to learn, and it is one that you can play with your child, or (as my father did) that you can suggest they try on their own. Advise for first timers:

  • Pick a good spot where activity is likely to happen soon (near the bird feeder in the backyard is a good spot).
  • Get comfortable so that half way through their/your legs won’t be asleep.
  • Focus on listening for the animals that will come in from all directions. (If you turn too quickly to look, you’ll lose your chance; better to listen first.)
  • If your child finds holding still for that long too difficult at first, you can throw a blanket over them so that just their face shows. This will allow them to twiddle their thumbs, scratch the inevitable itch, and move ever so slightly without nearby critters noticing.

Learning to hold still is the stepping stone to many wonderful natural moments. Both hummingbirds and chickadees will land on outstretched hands that haven’t moved for some time (with hummingbirds, place your finger near a hummingbird feeder, like a perch, and wait, or do like this lady did; with chickadees, stand near your birdfeeder with seed in your outstretched hand—here is an excellent instructional on handfeeding. Nature photography, for beginners and experts (here’s a fun example!) alike, begins with finding a good spot, and waiting as long as it takes (if you’re into wildlife photography, here are some good tips.

The skill is an important one, especially for children. It teaches the value of patience, the rewards that come with waiting, how to focus for long periods of time, and the important skill of observing. It reminds them that the world doesn’t always move as fast as television would make it seem. And it gives them something to brag about later (“I was five feet from a squirrel and he didn’t even know I was there!”). The squirrels in my back yard move at the same speed that they did when my grandfather was a child—nature is immune to the social revolution in which your children find themselves, and provides a natural context for learning skills that apply to every generation.

________________________________________________________________________________________

Three Lazuli Buntings, the color of jewels and rainbows, flew into the grove and proceeded to squabble, completely unaware of my presence. A Western Tanager flew to a perch somewhere over my head and serenaded the world. I contemplated turning to get a better look when I heard a noise beside me. Slowly, ever so slowly, I moved my head. There, sharing the shade of the Tamarisk grove with me, was a jack rabbit. Not five feet from my hunched self, he stretched his back legs out behind him, pressed his belly into the cool dirt, laid his long ears flat across his back, and closed his eyes. I could see the hair on his rump was ruffled, I could see the nick in his ear, and I could see how very big his nose was. Why was I here again? For this moment.

Making the perfect, transportable rope swing

We’ve started packing our homemade hammock and our rope swing on every campout and day trip. EVERY trip. In fact I tried to get my husband to leave it home a few months ago when we were packing for a trip to the Nevada desert. “Why are you packing these? You’re never going to hang a hammock, let alone a swing in the middle of nowhere.”

I was plesantly proven wrong on both accounts.

Joe has found places for hammocks and swings in just about every campsite we’ve been in this past year. It’s been a blast for the kids, so I asked him to write up a little tutorial on how to make and hang a rope swing.

MAKING YOUR SWING:

We use a disc swing as opposed to a traditional swing because it’s easier to hang. Only having one rope to hang means you don’t have to mess around with getting ropes even.

You can use pretty much any type of wood, as long as it will hold up to having someone sit on it. We’ve used 3/4 inch plywood or 3/4 inch particle board, both worked equally well.

Step 1: Trace the seat onto the wood, a 5 gallon bucket lid is the perfect size. Just set the bucket lid onto the wood and trace a circle around it

Step 2: Using a jig saw or something similar cut out the circle you just traced.

Step 3: Drill a hole in the center. There is probably a good way to find the center of the circle so you can drill a hole exactly centered in the swing but we always just eyeball it and it turns out fine. We use a 1 inch drill bit but a slightly smaller bit would probably work too, depending on the diameter of the rope you plan on using.

Step 4: (Optional) Seal the swing seat with some polyurethane or something like that.

Step 5: Attach a rope. There are two different way to do this pictured to the right.

Swing 1: Using about 6 feet of rope fold it in half, put the ends through the hole and tie a big knot.

Swing 2: Attach a short section of rope (about 3 feet) to the swing by stringing one end of the rope through the hole you just drilled. Tie a large knot at each end of the rope. Be sure to tie a good knot that will not slip like a figure 8 or similar.

Step 6: On the other end of the rope tie a loop in the rope using a figure 8 or overhand knot (this loop will allow you to attach the swing to a fixed rope with a carabiner).

HANGING YOUR SWING:

I’ve used several types of rope and most work equally well. Static rope (without stretch) is better than dynamic rope (with stretch). In our yard we often use 1 inch tubular webbing because there is very little stretch and it sits flat against the branch so it rubbs less than most ropes.

There are several ways you can get your rope up in a tree:

Method 1 (photo to the right): Our preferred way to hang a rope is to climb the tree and tie the rope to a branch. Tie a loop in one end of the rope with an overhand knot, hang the loop on one side of the branch with the long tail hanging on the other side. Then underneath the branch thread the long tail through the loop and pull it tight. This method seems to secure the swing and minimizes the rubbing of the rope against the branch because the pivot point of the rope is against the loop rather than against the bark of the tree.

Method 2: If you can’t climb the tree, throw one end of a long rope over a branch (photo 1 below) and secure the other end to the base of the tree (photo 2 below). The downside of this method is you have very little control over the exact location the rope hangs on the branch, and often this method leads to a lot of rubbing of the rope on the tree. Still, it work out fine in a pinch.


Once you have your rope up take the dangling end of the rope and tie another loop with an overhand knot and secure your swing to that loop with a carabiner. Depending on how permanent you want your swing to be, you can cut the rope to a desired length or simply tie up any extra rope above the swing.

We often tie several loops at the end of our rope at various heights (like this), the highest one for adults with long legs, a lower loop for middle sized kids, and a low loop for little kids. Then we use a carabiner to attach the swing to the desired loop.

Enjoy!

10 cool kid facts for a Full Moon night.

Did you know that the full moon is the only moon that comes up at sunset and goes down at sunrise? That’s precisely what makes it so perfect for night hiking. What could possibly spice a hiking up like walking in the dark of night with no need for a headlamp and your shadow trailing behind you.

Here are a few other kid friendly facts I’ve learned about full moons.

1. Is the moon really perfectly round? The full moon may appear round, but is actually shaped like an egg with the pointed end facing earth.

2. Why is the moon bigger as it’s coming up over the horizon? Well, it’s not. Scientists have long battled to explain the “moon illusion”. The phenomenon is understood to be caused by human perception rather than the magnifying effect of the earth’s atmosphere.

3. How often do we see a full moon? The full moon occurs every 29.5 days – the duration of one complete lunar cycle.

4. What’s the ‘Flower Moon’ all about? The full moon has many names. The Algonquian people had a different name for each full moon, depending on the month. Each name is linked to the season and nature. My favorite is September’s Harvest Moon, but did you know the Strawberry Moon is the name for the full moon in June? This is because strawberries are ready for picking. Here’s a list of moon names and meanings.

5. How long does it take to travel to the moon? The moon is about 238,855 miles from earth. Traveling by car that would take 130 days. If you took a rocket it would take 13 hours. And should you choose to travel at the speed of light, you could get there in a meer 1.52 seconds.

6. How fast does the moon actually move? The moon travels around the earth at an average speed of 2,288 miles per hour. Sure doesn’t look that fast! Why do you think that is…? I have a few theories.

7. Why is the moon so bright? It’s actually not, well, not really. The moon is not a light source, it doesn’t make its own light, it reflects light from the sun. We can see the moon because light from the sun bounces off it back to the earth. If the sun wasn’t there, we wouldn’t be able to see the moon.

8. Why does the moon change shapes, then sometimes disappears entirely? The moon appears to change shape but what we are actually seeing is the moon lit up by the light from the sun in different ways on different days. Check out this graphic from red-roko (to the right). It shows this perfectly.

9. Where does the phrase “once in a Blue Moon” come from? The second full moon occurring within a calendar month is called a Blue Moon. The latest was seen on 31st May 2007. And just to put this phrase into context, his phenomenon occurs once every three years on average.

10. Why does the moon follow me? If you’re driving down your street at night, it may look like the moon is chasing you, zooming behind the treetops to keep up with you. The moon isn’t actually following you, though. It’s just an optical illusion. The moon appears to follow you because it’s so far away. As you walk or drive along, things much closer to you, like trees and houses, appear to move between you and the moon making it look like it’s the moon that’s actually moving.

10 Night Games to play while camping

Capture the Flag. The best place I’ve ever played this game was in a sandy wash with sorta steep sides. In this beloved game, each team hides a flag on their side of the wash, or field, or dirt road. Team members strategize to sneak over steal the other team’s flag without getting caught while also guarding their own flag against capture. More info on Capture the Flags rules here.

Hide and Go Beep. If it’s to dark to play hide and seek, this game makes fora nice post-sunset substitute. To play, simply locate one another by sound having hidden players “beep” every 30 seconds or so.

Flashlight Tag. One person is “it” and holds a flashlight, unlit. When he sees another player, he quickly turns on the flashlight and shines his light on them. The rest of the players do their best to avoid being spotted with the flashlight. If the “it” player shines his flashlight on you, you take the flashlight from him and are now “it.”

Signals. Players should pair off and create a flashlight signal (one short and one long flash, three short flashes and so on). Partners must then separate and go to opposite ends of a large, open playing area. Players are given one minute to scatter before they begin flashing their signals. Each pair tries to reunite as quickly as possible by sending flashlight signals to partners. The first pair to reunite is the winner. (more…)

Discovering the inner artist: tricks for bringing out the creative child.

This weekend my husband and I headed to the local art museum. There was a gallery featuring artwork by the local high school students. Incredible. Even the pieces missing symmetry or the ‘perfect’ level of shading impressed me. The effort. The thoughtfulness. The unique perspective of each student manifested as creative license in each piece.

I thought of my own daughter and wondered how in the world I would ever be able to encourage the artist in her, considering my lack of formal artistic training. It’s one thing to teach your kid how to glue construction paper and glitter and popsicle sticks together, but it is another beast altogether to teach a child to recreate, on paper, with a pencil, the world around them.

Naturally, I turned to my mother for guidance. How do you teach a kid to draw when the whole idea intimidates you? I grew up watching her draw–for fun, to earn some extra money, and with us. She somehow managed to be encouraging even while she carefully corrected us. She taught us to forgive ourselves when our drawings didn’t look like we thought they should. She taught us to try again, because trying again was fun. I remember drawing with her so clearly, but I don’t remember her technique–how did she teach us to embrace the challenge of recreating something on paper?

She agreed to write up her thoughts on the subject to share with you all…

It is a common misconception that children need to be taught to draw. But really! They don’t need someone to show them how to make a mark. They love to make marks—on walls and floors and brothers and bellies. I can’t remember a time that I didn’t have a pencil in hand, but it wasn’t until I was in my 30’s that I learned how to “draw” in spite of countless hours and a small fortune invested in lessons. Soon after, I started teaching at my daughter’s elementary school as a volunteer. What I discovered is this: Teaching children to draw means first teaching them to see and teaching them to see means giving them permission to ignore the symbolic world of our educational system. There’s nothing wrong with symbols: this post would mean nothing to you if you had not mastered symbology (i.e. letters) in school. But when it comes to drawing, I find that spaces, lines, texture, hue, saturation and color are much more interesting than symbols. (more…)

Danielle: Stand Up Paddleboarding with kids.

I recently moved down the street from a lake. A bonafide honset-to-goodness lake. I’ve been toying with the idea of getting into stand up paddleboarding (SUP). Preferable with my kids. So I knew just just the person to go to for advise. Danielle and her husband own Sweetwater Paddle Sports in Southwest Florida and run a SupMommys group, a class where Moms AND their kids come to learn the ways of the paddleboard.

Thanks for sharing your wisdom Danielle. Can’t wait to try this out.

How did you get into Stand Up Paddleboarding?

I grew up in Naples, Fl (on the beach), then lived in the Virgin Islands with my husband for a few years. Being on the water has always been a part of who I am.

Three years ago my husband and I got the urge to try stand up paddleboarding since surfing is rare on the southwest coast of Fl. After a few times out on a board my husband and I decided we wanted to open our own stand up paddleboard shop, Sweetwater Paddle Sports. We’ve been open for 2 years, have been crazy busy and are now expanding!

What made you decide to start your SupMommys group? (more…)

Find out what wildflowers are blooming in your neck of the woods

It is so close to springtime here. The grass is mostly green. The Fox Sparrows are back in front of the house. Robins are perusing the lawn for tasty grubs. The Red-tailed Hawks that live in the Cottonwood just down the road are searching the fields for voles again. Mud Season has just about passed and I don’t have to wipe the dogs’ feet every time they come in the house. Flowers will be unfurling their splendid banners any day now!

They may already be blooming where you are… and if you aren’t sure, there are a number of excellent websites that can keep you up to date on the blooms occurring in your neck of the woods. Here are my favorites, arranged by region (this list is hardly comprehensive, but is a start). (more…)

Seventeen props to consider bringing when camping with kids

We always advocated that being outside is its own reward; that kids can be entertained with a minimum of ‘toys’ while in Nature’s Playground. And while we still stand by that, it’s also true that a few simple props can greatly enhance any camping trip–especially ones that last a few days.

Here’s a list of our favorite camping gadgets. If your kids are especially short on attentiveness, space these out over a few days for even greater enjoyment.

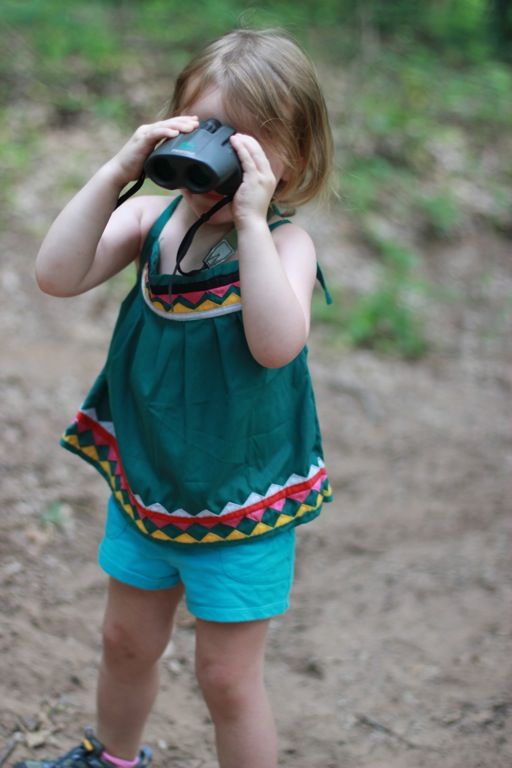
  • Binoculars Whether it’s to view the night sky or the moon, magnify a spider (turn your binoculars upside down), or check out the birds in the trees above camp, binoculars are a great addition to any bag of camping goodies. With adult supervision, any pair will work or you can buy your kids their own pair fairly inexpensively. Look for ones with low magnification, wide field of view, not too heavy or consider a pair specific to kids. I’ve been drooling over these made by Bresser. They ship from Germany. For older kids, invest in a pair that is durable and will last awhile (but still not too expensive). I like these Pentax binoculars. We wrote a post a few years back on teaching a kid how to use binoculars.
  • Whittling tools Hours of fun, and with the added danger of a trip to the emergency room! Just kidding… sort of. Buy a thumb guard, or put a leather glove on the hand holding the carving wood to reduce the chance of injury. If you want to splurge, get a beginner’s set of wood-carving tools. Otherwise set them free with a pocket knife (there are many good pocket knives for young outdoorsmen, but I will forever be partial to Old Timer’s because it was my first). A good beginner project is a marshmallow roasting stick. Also fun are flutes. You can also buy blocks of wood for beginners, or give your novice a bar of ivory soap and see what emerges. (more…)

12 activities for getting outside on a windy day.

Since March is typically famous for it’s windy days, I’ve been brainstorming new and exciting things for my kids to do when I throw them outside in a windstorm. Some of these ideas we’ve tried, others I greatly look forward to trying.

Build a storm proof hut
We do this activity quite often. Challenge your kids to go out and make a structure that will not blow away in the wind. Our favorite wind hut prop is our plastic swimming pool. It’s always very exciting when we fail and the pool goes flying across the yard.

Make wind chimes
Get a stick and dangle all sorts of noise making objects from the stick. Nails, jar lids, shells, beads, silverware, tin cans, bells etc. Hang them up in the wind and listen to the beautiful music you’ve created.

Conduct experiments
Get some of your clothes out of the washing machine, hang some outside and some in the house. Which one dries faster? Make paper airplanes and fly them both outside and inside. Do they fly the same? The possibilities are endless here. (more…)

  • WELCOME

    I'm Lindsey. I'm an environmental educator, my husband's a biologist. The outdoors is infused into everything we do; which explains why I'm better at mud pies than home decorating. More About Me

    I don't blog alone! Meet outsidemom contributer Olivia
  • KEEP IN TOUCH

  • PROUD TO SUPPORT

  • ACCESS ARCHIVES