Dutch Oven Cooking 101
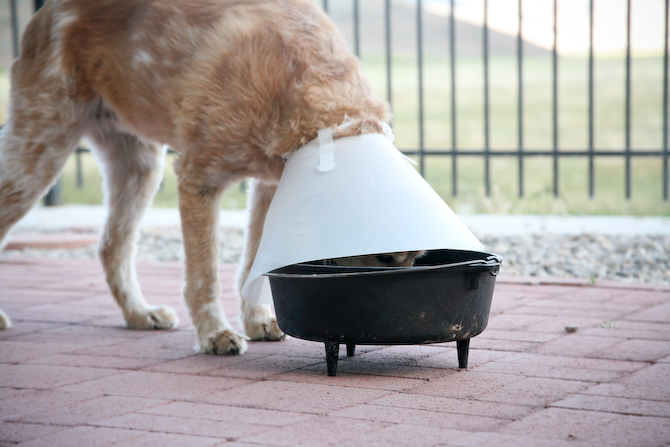
Note: As per the discussion on facebook, this article does indeed end with the photo of a dog eating out of Dutch Oven with a cone on it’s head.

For me, cooking outside is either a complete nightmare or a wonderful delight. It all depends on the weather (want a little food with your sand? Anybody feel like stepping out of the car and into the rain to see how the chili is doing?), your mood (who wants to make fajitas after coaxing kids to walk three miles in seven hours?), and the mood of those who will be eating your food (come on, son. One more bite and then you can roast marshmallows). For those moments when the stars align, the children are happy, the cook is motivated, and the weather is gorgeous, consider the dutch oven. Why? Let me tell you.
Why You Should Consider a Dutch Oven
- Dutch ovens have the magical ability to turn any dish into a culinary delight because a) they’re magic; b) they are novel and novelty always tastes better; and c) they are wonderful cooking tools that excel in both the indoor and outdoor kitchen—they heat evenly and (if well seasoned) bring their own subtle flavor to any dish.
- Children find baking outside to be fascinating, and children are good at digging holes in which to place your dutch oven while it cooks your dinner.
- It requires little work after you’ve dumped everything into the pot.
- It will impress the family you invited along with you, and they’ll go home raving about what an amazing outside mom (or dad) you are.
For those of you who have been tempted, but are intimidated, let me ease the pain. Dutch oven cooking is super easy. Tomorrow I’ll share three simple (very simple) dishes for you to try when you are feeling bold and wanting to show off. Today, a few pointers for those of you who are interested in buying and prepping a portable oven.
How to Pick a Good Dutch Oven
If you’re unsure, wait for a sale and buy a name brand oven—it’ll take out some of the worry about whether your oven will perform up to snuff. Here is my favorite. And here are a few simple things to keep in mind when shopping around for a dutch oven:
- Don’t buy a ginormous one unless you plan to make ginormous meals. Cleaning up a dutch oven while camping can be annoying—the less food you have to throw out the better (and your meal will cook faster with a small dutch oven). Twelve inches has always seemed a good size to me—it easily feed four to six… if you’re worried about too much food, 10 inches is also a good size (and weighs less).
- The walls of your oven should be of an even thickness with no pits or holes in them. Cheaper ovens quite often are made of a poorer quality material.
- Make sure your dutch oven has a lid with a lip (so that coals wont slide off), has a handle, is slightly concave (not flat, but domed), and tight fitting.
- Make sure your dutch oven has legs, so that it can stand over coals. Legs should be about an inch tall, and should be fairly thick and sturdy (I read online that with cheaper dutch ovens, the thin legs will poke through the bottom of the oven when it gets hot!)
- You’ll have to pick between an aluminum and a cast iron dutch oven. There are pros and cons to each: aluminum dutch ovens are much lighter weight (good for boating trips), and are easier to clean. You can use soap on them and they won’t rust. However, they can’t stand high heat as well, and there is a chance of melting them in a hot fire. They also don’t heat as evenly, and you can burn biscuits and brownies easier in them. Cast iron ovens are significantly heavier, but heat more evenly (albeit much more slowly), and to hotter temperatures. You shouldn’t use soap in these, and they’ll rust if you don’t re-season them from time to time. The experts say there’s not really a big difference for most everyday uses.
- If you don’t want to go through the process of seasoning it, you can buy pre-seasoned ovens.
Seasoning the Dutch Oven
Once you’ve purchased your dutch oven, you’ll need to season it before taking it out on a trip (assuming you didn’t go the pre-seasoned route) This will prevent rust, and help keep food from sticking to the inside (when camping, it is nice when the dishes come clean easily!) While seasoning is not essential, it will significantly prolong the life of your dutch oven, improve the taste of food cooked in it, and will keep it from looking corroded. Aluminum dutch ovens don’t have to be seasoned, but if you do, it will keep food from sticking to them as badly.
Warning: seasoning a dutch oven can smoke up your kitchen! If your grill is big enough, season it outside using the grill—there will be no smoke in the kitchen, and no stinky oil smell! If you can’t do this outside, make sure to open a window or two!
- Dutch ovens come with a thin coat on them to keep them from rusting. Wash your new dutch oven with soap and water (including the lid) so that you get this coating off (this is technically the only time you’ll take soap to your dutch oven). Aluminum dutch ovens won’t rust, but you should still give it a good washing before you use it the first time!
- Dry your dutch oven thoroughly (the best way is to throw it in the oven on low heat in order to make sure all the water has evaporated out of it).
- Turn the oven up to 350°; while the oven heats up, use paper towels or a rag to wipe the inside of your now-dry dutch oven with oil or shortening (avoid butter-flavored). Make sure to coat everything, but don’t leave any pools of oil—mop these up with a paper towel. Some people coat the outside too—I never did, but now I’m wondering if I should have???
- Line the bottom rack in your oven completely with tinfoil placed inside a cookie sheet. Place your dutch oven upside down on the rack just above… place the lid beside it (or bake it next). The tinfoil should be positioned to catch any oil that drips out of your dutch oven. The point here is to keep the oil that drips out of your dutch oven from hitting the bottom of the oven. Do whatever you need to in order to accomplish this task!
- Let it bake for an hour.
- Repeat the whole process again (apply oil, wipe out excess and bake for another hour).
- Let the oven cool on its own.
Your dutch oven is ready to go!
For the first few uses, don’t cook anything too acidic or sugary (cobblers, tomato-based dishes, etc.)—this will break down the protective coating before it’s had a chance to build up.
Here are a few accessories you may want to think about buying with your oven (none are necessary—you can make something up that does the trick if you don’t have the money), but they do help).
- Lid lifter
- Tongs
- Coal starter
- Lid stand
- A pail the diameter of your dutch oven that can withstand a bit of heat
- (And if you’re super fancy) Storage bag
Remember, recipes coming tomorrow!


4 Comments so far
Comments Feed
So I missed the FB discussion yesterday and while the kid is adorable, my lingering question is why is the dog in the cone?
Brandi – Poor K-So (out dogs name) had a bit of an issue with her anal glands. I know, makes me queasy just typing it.
Man life’s ruff…
Have a red heeler too, likes the pot lickees too. Photo cracked me up! Great blog keep up the campin recipes