THIS SITE REQUIRES JAVASCRIPT TO BE ENABLED TO BE VIEWED CORRECTLY. PLEASE ENABLE JAVASCRIPT! INSTRUCTIONS

Category Archives: Do It Yourself Gear

Wilderness ‘survival’ skills for young children

For families who spend a lot of time in the outdoors, having a child wander off and get lost is pretty unlikely. At the same time, it’s also a very real possibility. I often wonder if/how my child would survive a night in the wilderness. Or 2 nights, or even a few hours. So I’ve been thinking about what skills would be appropriate to start learning for the average 6-11 year old, before they are of age for hardcore Boy Scout techniques.

Every outdoor child should be equipped with a few basic outdoor skills, (mostly to combat an inevitable freak out) along with a little ‘survival kit’ to keep in their backpack.

If your kids are older you can make them this more extensive survival kit. But for young kids you really can only pack what they know how and are developmentally able to use. A survival kit is something that can be built upon over time. As they get older you can add more and more items (like fire starting supplies) and teach them how to use them.

My oldest is 6, so we’re starting out with the following as a bare minimum:

Extra food
Water
Knife
Flashlight and batteries
Water purification tablets
Small signaling mirror
Whistle
Toilet Paper
Bandaids

Assuming they have these few basic tools, below are some good beginner skills to go over. The S.T.O.P. acronym (Stop. Think. Observe. Plan.) is a great place to start, and is a helpful tool for kids when it comes time to remembering what they should do.

STOP (Stay where you are)

The second your child realizes he/she is lost they should stop immediately and wait. Attach a whistle to your kids backpack, as soon as they realize they have become separated from the group tell them to start blowing that whistle like crazy.

THINK (Don’t freak out)

This is perhaps the hardest and most important wilderness survival skill to develop, especially if you’re a kid. A child however will be less likely to freak out if he/she knows what to do.

Talk to your child about how easy it will be to have a meltdown when they realize they’re lost. Then make sure they understand how important it is to stay calm, or become calm. It’s hard to think and plan unless you’re able to be rational. Try to recall everything your parents have taught you and go from there.

OBSERVE 

Look through your backpack. What do you have with you that can be of use. Whistle? Use it often. Food? Save it until you’re really hungry. Water? Save it until you’re really thirsty. Rope? That could be used for making a shelter. Knife? That might come in handy.

Also observe your surroundings. Does the place look at all familiar? Is there a good place for a shelter? Water nearby? A place where you can safely get up for a better view?

PLAN

Now what? Take time to think about what you need to do first. Ok, You’ve blown your whistle for the last 20 minutes. Now what. It’s getting late, maybe you should think about a shelter…

DRINK WATER

Water is the most important survival item you can have, it’s also a hard one for little kids, which is why I always stock my kid’s packs with plenty of water and tell them to ration it if they become lost. Your body can still function with little or no food for weeks, but it can only last a few days without water.

The problem is, unless you find yourself lost next to a water source you shouldn’t exactly wander off looking for water and get even more lost. However, if it has been a day or two and you’re still lost and out of water, it’s going to be worth it to wander off and try to find some.

The easiest thing for little kids to use and carry is water purification tablets. Make sure they have some in their pack and know how to use them. Also make sure the know when to start venturing out to find water.

FIND SHELTER

Next to having enough water, finding a shelter to protect you from the elements (either cold or hot weather) should be top priority. Take advantage of your surroundings. Rock overhangs would be ideal, but if you don’t have that, find some limbs, leaves and/or pine boughs to make a shelter. A lean-to is probably the easiest for kids. If your child is old enough to make one, it might be fun to practice out on the trail, or in your backyard. If they are still young encourage them to find a rock or a tree that they can sit next too to keep them out out of the sun/rain.

PREPARE A SIGNAL

If you’re lost in the wild surviving is, of course, your first priority. Your second should be getting yourself out of there! There are several safe and easy ways your child can make a signal.

  1. Use a mirror (If you have one) or some other shiny or metallic object.
  2. Create a signal with rocks (that contrast with the ground color). Spell out “HELP” or “SOS”, or even a big smiley face our of rocks will get noticed!  Make sure your child knows to make the letters big.
  3. If you hear a plane or helicopter get into an opening and run around and yell like a crazy person.

KNOW BASIC ANIMAL SELF DEFENSE

I would image that the #1 concern for a lost child is the prospect of being eaten by a wild animal. Or maybe that’s just my kids. While unlikely, I think your child would be a little more at ease if they knew what to do when they encountered a wild animal.

I wrote a post a while back called what to know when encountering wild animals. Take a look, pick out the animals that live in your area and go over basic information with your kids. The point is not to make them even more freaked out, just to give them some confidence in their skills should they spend a night in the woods alone. Also good skills to have even if you’re not lost.
Making the perfect, transportable rope swing

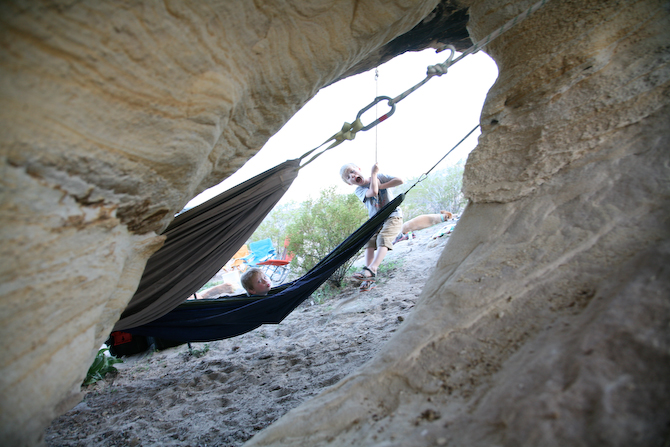
We’ve started  packing our homemade hammock and our rope swing on every campout and day trip. EVERY trip. In fact I tried to get my husband to leave it home a few months ago when we were packing for a trip to the Nevada desert. “Why are you packing these? You’re never going to hang a hammock, let alone a swing in the middle of nowhere.”

I was plesantly proven wrong on both accounts.

Joe has found places for hammocks and swings in just about every campsite we’ve been in this past year. It’s been a blast for the kids, so I asked him to write up a little tutorial on how to make and hang a rope swing.

MAKING YOUR SWING:

We use a disc swing as opposed to a traditional swing because it’s easier to hang. Only having one rope to hang means you don’t have to mess around with getting ropes even.

You can use pretty much any type of wood, as long as it will hold up to having someone sit on it. We’ve used 3/4 inch plywood or 3/4 inch particle board, both worked equally well.

Step 1: Trace the seat onto the wood, a 5 gallon bucket lid is the perfect size. Just set the bucket lid onto the wood and trace a circle around it

Step 2: Using a jig saw or something similar cut out the circle you just traced.

Step 3: Drill a hole in the center. There is probably a good way to find the center of the circle so you can drill a hole exactly centered in the swing but we always just eyeball it and it turns out fine. We use a 1 inch drill bit but a slightly smaller bit would probably work too, depending on the diameter of the rope you plan on using.

Step 4: (Optional) Seal the swing seat with some polyurethane or something like that.

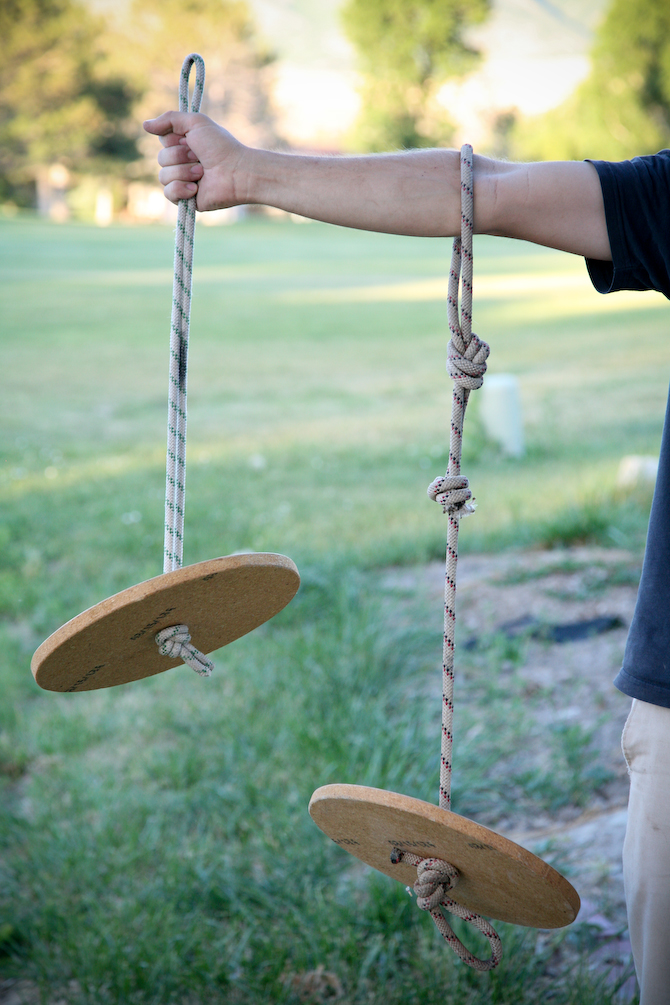
Step 5: Attach a rope. There are two different way to do this pictured to the right.

Swing 1: Using about 6 feet of rope fold it in half, put the ends through the hole and tie a big knot.

Swing 2: Attach a short section of rope (about 3 feet) to the swing by stringing one end of the rope through the hole you just drilled.  Tie a large knot at each end of the rope. Be sure to tie a good knot that will not slip like a figure 8 or similar.

Step 6: On the other end of the rope tie a loop in the rope using a figure 8 or overhand knot (this loop will allow you to attach the swing to a fixed rope with a carabiner).

HANGING YOUR SWING:

I’ve used several types of rope and most work equally well. Static rope (without stretch) is better than dynamic rope (with stretch). In our yard we often use 1 inch tubular webbing because there is very little stretch and it sits flat against the branch so it rubbs less than most ropes.
There are several ways you can get your rope up in a tree:

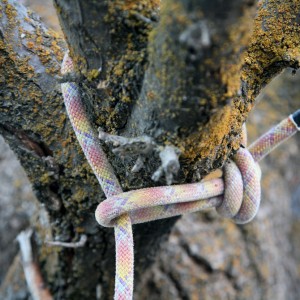
Method 1 (photo to the right): Our preferred way to hang a rope is to climb the tree and tie the rope to a branch. Tie a loop in one end of the rope with an overhand knot, hang the loop on one side of the branch with the long tail hanging on the other side. Then underneath the branch thread the long tail through the loop and pull it tight. This method seems to secure the swing and minimizes the rubbing of the rope against the branch because the pivot point of the rope is against the loop rather than against the bark of the tree.

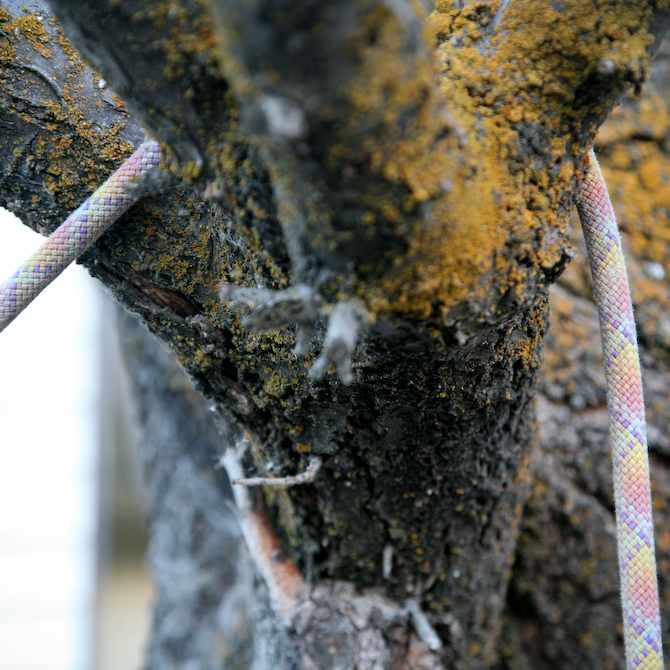
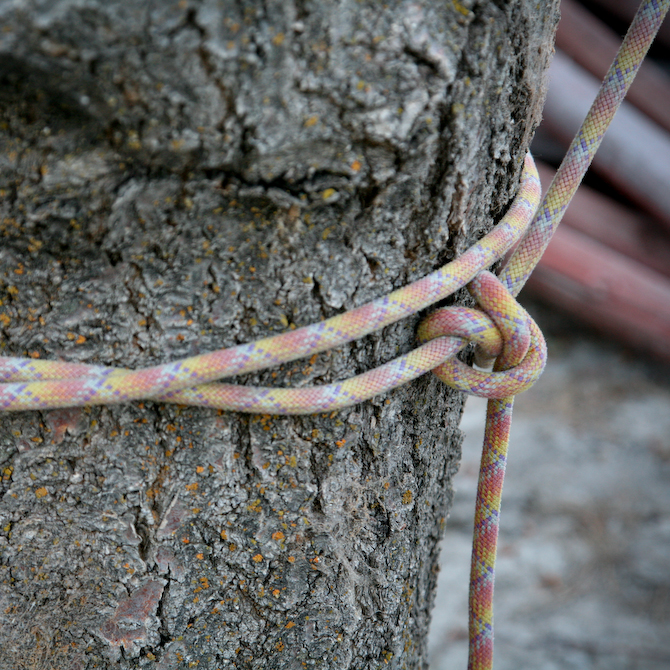
Method 2: If you can’t climb the tree, throw one end of a long rope over a branch (photo 1 below) and secure the other end to the base of the tree (photo 2 below).  The downside of this method is you have very little control over the exact location the rope hangs on the branch, and often this method leads to a lot of rubbing of the rope on the tree. Still, it work out fine in a pinch.


Once you have your rope up take the dangling end of the rope and tie another loop with an overhand knot and secure your swing to that loop with a carabiner. Depending on how permanent you want your swing to be, you can cut the rope to a desired length or simply tie up any extra rope above the swing.

We often tie several loops at the end of our rope at various heights (like this), the highest one for adults with long legs, a lower loop for middle sized kids, and a low loop for little kids. Then we use a carabiner to attach the swing to the desired loop.

Enjoy!

DIY: Convert your bike trailer into a ski trailer

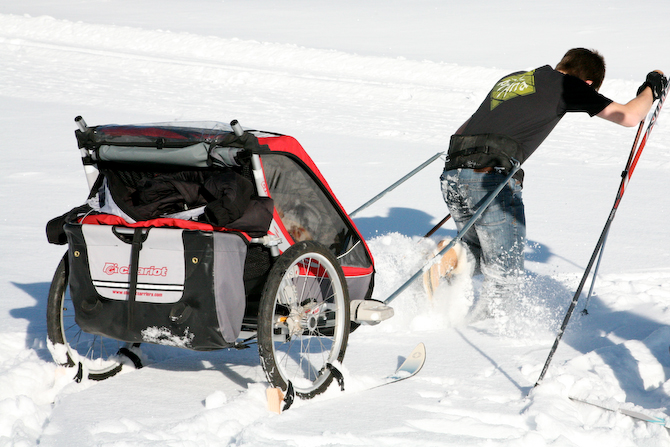
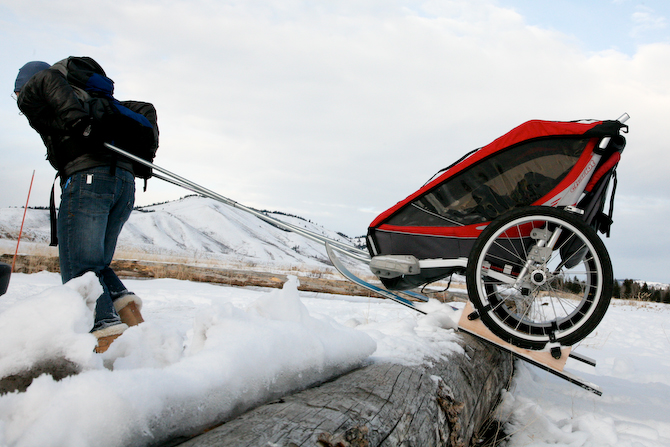
We’re pretty cheap, or rather, ‘thrifty’. So when winter came around a few years ago and we wanted to pull our chariot around in the snow, we opted not to buy the official conversion kit, but rather build our own.

First, we rented the official version, skied around for a day, then came up with our own plan. To be honest, we actually like our version better than the real deal. Why? Allow me illustrate.

1. If you leave the wheels on you have a bigger range of motion and can go over stuff like this (photo below). 2. If you make your own you can use fatter skis, that means better performance in powder (photo below).


Or maybe we’re just trying to make ourselves feel better about being ‘thrifty’?

At any rate, here is a step by step guide on how we converted our chariot into a skiing machine. Note: Hold your mouse over the photos for explanations. (more…)

Three ideas for building your own bike rack

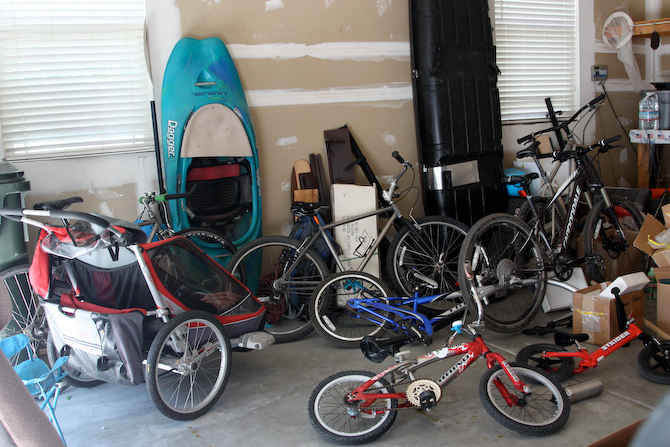
After a month of living in our new home we finally took the weekend to unpack and organize the garage. The biggest problem we faced was the number of bikes we own: 4 kid bikes, 4 adult bikes, 1 bike trailer and 1 trail-a-bike. After careful consideration 2 kid bikes we’re booted out to the shed but the remaining 8 contraptions needed to be accessible.

With all of us bike commuting every day and mountain biking whenever we get the chance we were in a constant state of bike piles. The garage looked like this, on a good day…

We wanted to build a bike rack, but had a few criteria. It needed to be 1. Cheap. 2. Easy to assemble. 3. Sturdy. 4. Adjustable. We found three viable options online (click links below for photos and instructions). Option 1 and 2 can even be made to fit in your truck bed.

  1. Rack made from PVC pipe.
  2. Rack made from 2×4’s and other assorted wood pieces.
  3. Rack made from pallets.

We chose option #1, the PVC pipe, but made the following modifications: (more…)

Planning an overnight family bike trip

Today’s post is compliments of Stacy from A Simple Six. Her and her family (of 4 kids) recently took a different kind of weekend vacation, they did an overnight bike trip. I love the idea and have recently been thinking to do something similar with my family. While we’ve been eyeing a simple trail in Point Reyes National Seashore, I love that Stacy’s starting point was her own front yard.

Thanks Stacy for all your great advice on how to plan an overnight family bike trip. Fabulous ideas, can’t wait to put them to use! And as always readers, please feel free to leave a comment with your own advice, experiences or questions.

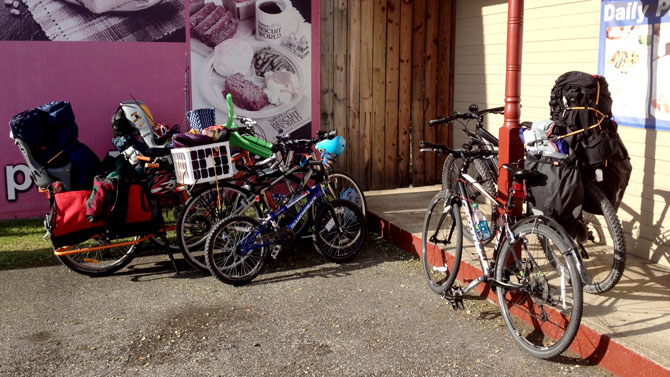
How do you save money on family vacation travel? Have you seen the price of gasoline!? What about hotels? The frugal solution could be in the form of a single overnight bicycle camping trip (S24O), one where you roll right out of the garage and pitch your tent several miles from home. Some tips for planning your trip: (more…)

Backyard birding: Seeing the outside while staying in

Getting out with the intent of seeing birds is a fabulous past time for families–I have many fond memories of making bird lists, arguing with my dad about the identity of tiny sparrows, and seeing much of Utah through my binoculars…

But birding in your backyard can be just as rewarding.  What’s more, building a bird paradise in your backyard is helpful to the little critters–especially in cities and urban areas where food isn’t as plentiful as it once was.  And it’s a great project for you and your kids.  Migration season is just getting started in some areas of the U.S., as birds from Mexico and South America make their way north, and food is scarce in areas inundated by winter.  Spend a weekend preparing a stop-over for weary birds.  Many bird feeders can be home-made; the same is true for nesting boxes and bird baths.  Involve your kids in making suet, hummingbird nectar, and fruit feeders.  Together, map out where to put different types of feeders for maximum visibility.

What’s more, ‘backyard birding’ is something that can be enjoyed by your kids when truly getting outside just isn’t in the cards. (more…)

Be road-trip prepared: Assemble a Car Kit

I got to thinking the other day that I needed to update our ‘car kit’. I started making a list of all the things I would need if stranded in/near my car with my family (in any season). After pondering the list I quickly realized I should consult Olivia.

As I read her list I had to laugh.

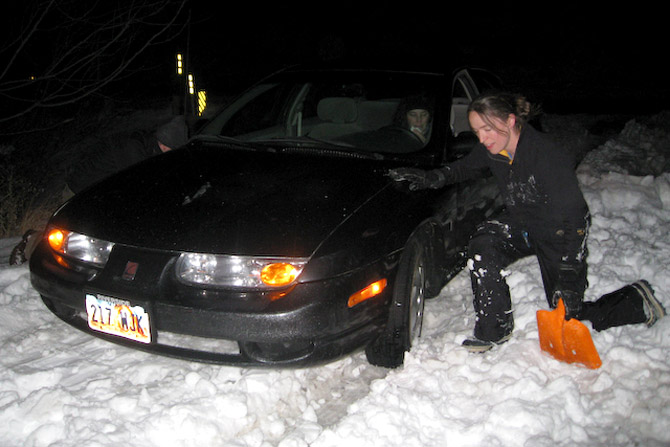
Why? Because being that I’ve spent a lot of time in the backcountry and on the road with Olivia I’ve personally seen nearly every one of these items in use. I can also recall several personal experiences where I wish I had this stuff (see stuck on beach photo below).

It may seem like a lot, but Olivia assures me she has all her emergency stuff shoved into one box that always rides in the back of her car.  In the winter she also tosses in the duffle bag full of extra clothes and warmish things (her duffle bag, by the way, has a shoulder strap, so if she had to walk , she could use it to carry stuff).

It’s all great info, so I thought I’d share the list with other travelers. (more…)

Gift Ideas for Outdoor Families

Christmas is coming up (I know, duh). And while I’m sure most of you have all your holiday gifts squared away (wink wink), for those who don’t, this post may help. All are gifts that will encourage you and your family to be outside. Note that they are also realistic, I refrained from listing a Sportsmobile and the entire inventory at Jacks Plastic Welding.

Let’s get right to it, here are my top 10 picks. 5 Things you can make and 5 things you can buy. Plus links to other outdoor Mom bloggers who are posting about outdoor family gifts today as well.

I’d also be interested to know what your’re giving this holiday…

5 Things You Can Make/Assemble

(more…)

Create your own ‘Olivia Bag’ (aka Survival Kit)

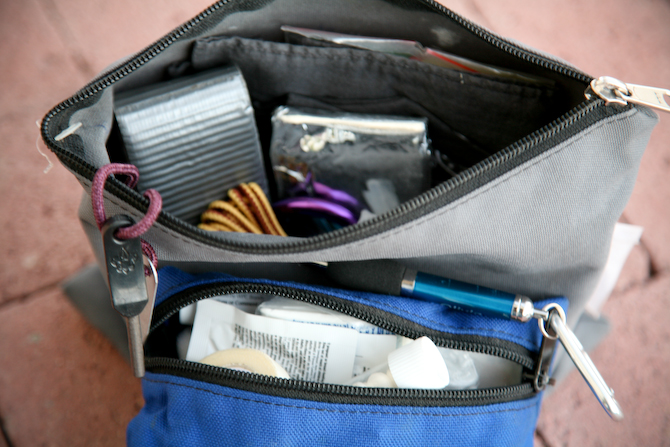
Olivia Bag /uh-LIV-ee-uh • ˈbāg/: a flexible container of random items compiled by Olivia for jimmy rigging anything (and just about any body) that breaks while out on an adventure.

The idea behind the Olivia bag (known to some as a ‘survival kit’) is that whether you’re hiking, backpacking, river-rafting, biking, or doing some other outdoor activity, the emergencies will generally fall into three categories:

1) Your equipment breaks.
2) You hurt yourself.
3) Something is inconvenient and annoying and needs an inventive remedy.

In all categories, the point is to fix the problem as best you can on the spot, making something that is ‘good enough’, and will get you back to the real world for a proper fix. I know it seems crazy, but I’ve used darned near every item in these bags at one time or another!

Make your own survival kit

I assure you that all these items fit into a small (5×6 or so) zipper pouch. You can use a make-up bag (found at most stores in the beauty isle, or at thrift stores), or something like a Pack-It Sac available at most outdoor stores.  You can even put all the small items into their own little baggies, purchased in the hobby section of your favorite “mart”.

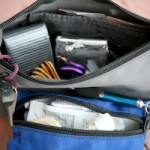
My Olivia bag is actually divided up into two bags (pictured above). The first (larger bag) has all the non-medical essentials (known as the “Olivia Essentials” below). The second is smaller and fits snugly inside the first. This bag has all the first aid supplies (listed below as the “Olivia Medical”). (more…)

Camping and the art of kid cleanliness

Keeping kids clean while camping.

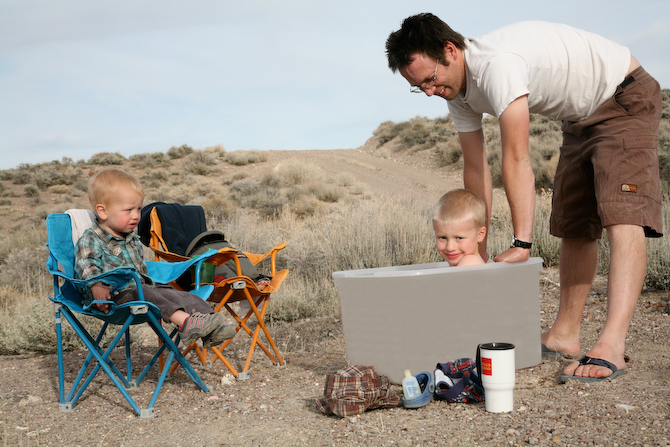
It’s been said that one of the major obstacles of camping with kids is how to clean them up at the end of the day. While I don’t have any magic formula for keeping kids from getting dirty when camping (since playing in the dirt is kind of the point) I have learned a thing or two about cleaning them up so you don’t have to put a filthy kid to bed in the tent.

Usually you can get away with a simple wash down, #1 or #4. But then there are those occasions when your child’s skin color has changed dramatically, they stink, and/or they have sand and poofy dirt in places that just seem uncomfortable. This may or may not take a few days to accumulate. For those occasions you may need to bust out #2 , #3 or #4. (more…)

  • WELCOME

    I'm Lindsey. I'm an environmental educator, my husband's a biologist. The outdoors is infused into everything we do; which explains why I'm better at mud pies than home decorating. More About Me

    I don't blog alone! Meet outsidemom contributer Olivia
  • KEEP IN TOUCH

  • PROUD TO SUPPORT

  • ACCESS ARCHIVES