THIS SITE REQUIRES JAVASCRIPT TO BE ENABLED TO BE VIEWED CORRECTLY. PLEASE ENABLE JAVASCRIPT! INSTRUCTIONS

Category Archives: Educational Activities

Teaching kids stewardship… with a grabber?

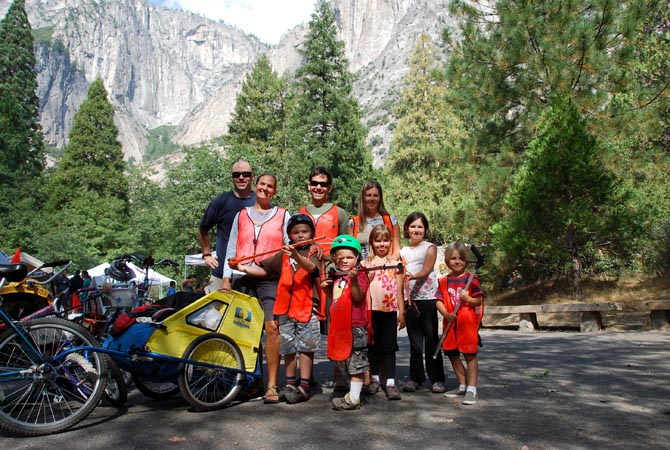
Todays post is brought to you by my friend Amber. We got into a discussion one day about kids volunteering and learning to taking ownership of their favorite natural places. The result was this awesome essay about her experience taking her kids to volunteer in Yosemite. I love it.

Has anyone else incorporated outdoor volunteerism into their outdoor outings? We’d love to hear your thoughts and experiences!

I grew up in a house where certain things were just, understood. Among such things was the understanding that if we didn’t take care of our things, we would eventually be out of things to take care of.  Although there was a certain resentment that accompanied this understanding, I knew when I had kids of my own that I wanted them to have the same sense of responsibility, or stewardship, over the things that were theirs.

I had the grand expectation that it would be fairly easy to help my child develop this sense of stewardship in every aspect of life, from toys, to friendships, to the natural world around them.

My child would not have the sense of entitlement that is so prevalent in so many kids today.

My child would always be noble, kind, and responsible. (more…)


Kids love plumbing

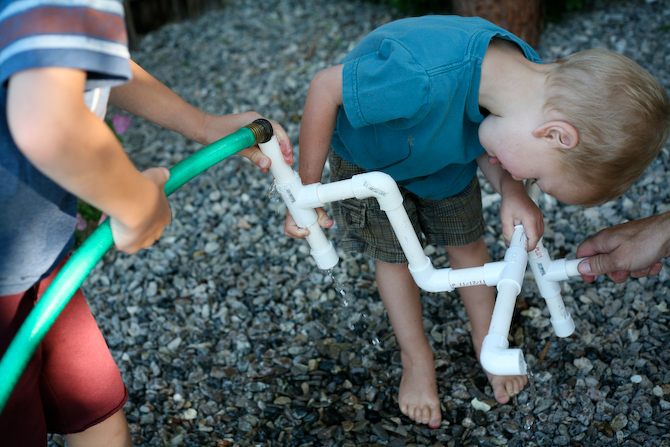
So one of the things that I stumbled upon while entertaining-I-mean-teaching small children over the last few months is that PVC pipe is amazing.  It is good for all sorts of things–practicing walking on a balance beam, learning the ins and outs of balancing something on your hand, building rocket launchers, marshmallow shooters, marble roller coasters, and making funny noises.

But of all the activities we used my wide selection of PVC pipe for, plumbing was my favorite (and I dare say theirs too–even the ever-so-picky sixth graders had a blast!)

If you’re looking for a great way to keep your kids entertained outside for a few hours next week, consider investing in some PVC pipe, aka, Legos-You-Can-Pour-Water-Through. (more…)


The exciting world of Macroinvertebrates

If there was one thing I could suggest you do with your kids this summer, catching aquatic macroinvertebrates would be near the top of my list. Nerdy I know, but in every Nature Center I’ve worked at, this activity has been the favorite of  parents and children alike (well, most parents). It involves water, mud, nets and unearthly looking creatures seldom noticed by humankind.

What’s an aquatic macroinvertebrate you ask? It’s a small water dwelling invertebrate, big enough to be seen without a microscope. Many of these critters are actually juvenile forms of well known adult insects. For example, does the picture to the right look familiar… it’s actually a dragonfly stuck in its awkward teenage years.

WHAT TO GATHER:

  1. Net for each child. This can be as simple as a aquarium net (ideally a long handled one) or as fancy as a ‘real’ aquatic net.
  2. Large shallow plastic tote. Something to dump the contents of your net into so that you can sift through it. We’ve used a variety of containers, whatever you use, just make sure the water/plant/sludge mixture is only about an inch or two deep so that you can look through it easier. (more…)


Giant slingshots: Angry birds for the real world.

I recently took on a part time job teaching science to K-7th graders after school.  Today I’m sharing with you one of the activities I did with the fourth through seventh graders:  Giant Slingshots.  Summer is coming and soon-to-be-school-free kids will be scrounging around looking for something to do.  Lest they decide to jump off the roof with bed sheets as parachutes for lack of any other suitable activity (true story), build them a slingshot.

I built this one in under an hour.  It’s not hi-tech, but it doesn’t need to be.  The students were completely captivated by the idea of being The One who slung a ball the farthest down the field.  As a result they listened intently to my (short) lectures on trajectory, velocity, force, mass, and aerodynamics.  I set it up on the grassy field behind the school, and ended up with every kid on the playground standing in line, waiting for a turn, and offering advice on how to get the next ball to go just a little bit further.

Here’s what you’ll need:

  • Two 10-foot long 2x4s
  • One 6-foot long 2×4 (you’ll have a little bit left over at the end).
  • Six feet of latex tubing.
  • Some tennis balls—the kind that come in a little mesh bag—you’ll need the mesh bag.
  • A little bit of twine—say two feet.
  • Ten screws long enough to go through a 2×4—say 3 or 3 1/2 inches long.
  • Some weights—logs, bricks, or whatever other heavy materials are lying around.

And

  • A circular saw or handsaw.
  • A drill and two bits: one of a slightly smaller diameter than the 3 inch screws, and one with a Phillips head.

All of these items can be found at your local giant hardware store.  They’ll be confused when you ask for the tubing, but it is there with all the other types of tubing (in my store on the very top shelf). (more…)


Keep moving on the trail: Create a kid friendly map

The Campaign for a Commercial-Free Childhood has put together a yearly event encouraging children, families, schools and communities to go Screen Free and make changes towards a more active and outdoor lifestyle. This year the event will happen April 30 – May 6th.

Tales of a Mountain Mama has pulled together a group of bloggers (like us) to help celebrate with blog posts (such as this one) aimed at encouraging families to go ‘screen free’ next week. She’s also got a week full of giveaways on her site, you can find out more information about that here.

– – – – – – – – – – – – – – – – – – –

While helping plan a father/son backpacking trip last summer, we were brainstorming about ways we could keep our boys (ages 4-6) moving on the trail. What could we do to encourage movement and limit whining…

We thought of the usual things: Plenty of snacks and treats (i.e. trail incentives), take some play breaks, emphasize the ‘big boy’ aspect, be patient etc.

We also brainstormed something far more genius: What about creating a kid friendly map, with pictures of prominent landmarks they could keep an eye out for. This would not only give them something to stay busy with on the trail, but would also incorporate some observation skills, as well as a little introduction to reading a map.

It was worth a try.

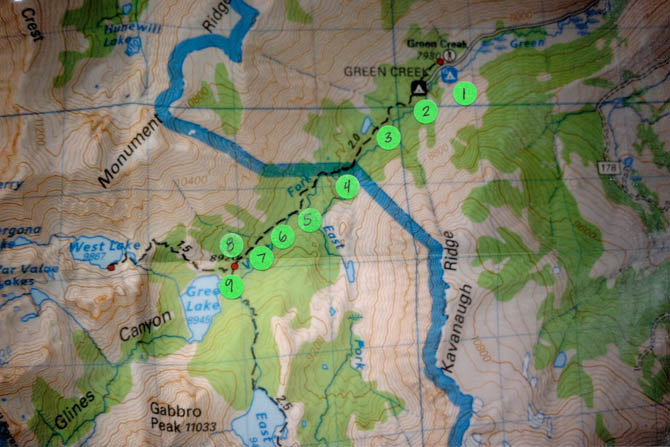
I can’t take any credit for the final product. One of the men on the tip ran the trail the week before and took photos, then he and his wife put together the maps. I love how it turned out! The large map was printed out as a 4X6; the way-point pictures were printed out smaller. All were laminated and stuck together with a metal ring.

Here’s a picture of the Map as well as a few way-point pictures.

NOTE: Word on the street is that the 6 year old took to it better than the younger kids, so keep that in mind.

A couple of additional ideas I’d recommend for keeping kids moving on the trail:


Change up the ol’ Easter Egg Hunt this year…

The first Easter that I clearly remember involved a basket, some plasticky green fluff, a bunch of chocolate, a candy shaped like the easter bunny, and a book about kittens.  All in a park.

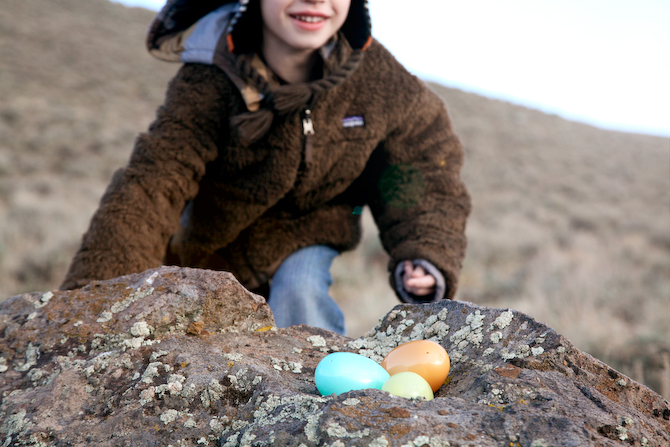
The best Easter I remember involved a car, 15 or so puzzling clues, a compass, a few 7.5 minute maps and a highway map, binoculars, a bottle of water, some plastic eggs, and a picnic in the desert.  Best.  Easter.  Ever.

So fun we did it the next year.  And the next.  It became a tradition. The day before Easter, my mom and dad would drive all around northern Utah leaving plastic eggs hidden in interesting and obscure places.  Three or so eggs at each place, replete with chocolates and jelly beans, and one egg with a ‘clue’ to the next location where eggs and candy could be found.    They’d give us a clue to start with, follow us around for the first few, and then leave us on our own for the last ones.  The last clue would lead us to a place known only to them.  When we’d arrive, exhausted and excited from our morning of treasure-finding, they’d be waiting there with an extravagant picnic lunch.

One year went something like this:

Clue 1: Lq wkh Edfnbdug.  (A little letter-shifting code for:  In the Backyard.)

Clue 2: Look In Between the Ridges of the Arch to Reap Your reward.  (i.e.:  Look In Between the Ridges of the Arch to Reap Your reward; i.e.: LIBRARY).

Clue 3: Drive three blocks east from here.  Turn north.  Drive one block.  Turn north again.  Drive 3.2 miles.  Turn east.  Drive 1 mile.  Flip a u-eey.  Drive 2.6 miles.  Park on the west side.  Commence searching. (more…)


Project BudBurst: Get outside with a purpose

I’ve had a few outsidemom.com readers suggest getting involved in Project BudBurst. I’d never heard of it until recently, but after looking into it a bit more I can see several reasons to get involved.

  1. It’s a great excuse to get you and your kids out for a weekly walk.
  2. Your kids get to become little scientists, they collect data. Real data.  And they learn that science isn’t that scary–it’s actually fun!
  3. The data actually gets used by scientists and educators, and they can see how their contributions help.
  4. It’s a good way to get your kids accustomed to making observations.

Projects like this are important because scientists can’t be everywhere at once. In order to investigate some of today’s most pressing questions, which are often global in nature, scientists are relying more and more on help from citizen scientists across the globe. The ability to gather and manage data on this scale has only been possible in the past decade or so, giving people like us the opportunity to help answer previously inaccessible questions.

So, what can we do?… scientists need data collectors.  Enter:  your kid.

What Project Budburst wants you to do: (more…)


Pre-K Lesson Plan: Hibernation & Getting ready for winter

Objective:
Learn about hibernation, run around a lot, be creative, work on sorting, categorizing, counting and number writing.

Materials:
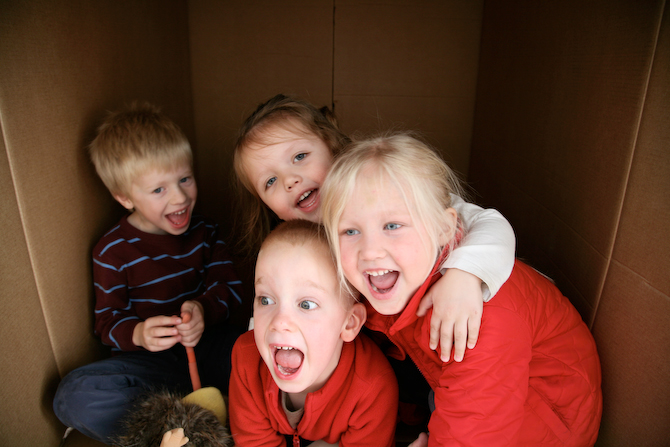
Large cardboard box, or ‘den’ (procured beforehand from a furniture store)
Glue, tape, markers.
Download and print the Hibernation Activity Sheet, one for each child.
Download and print the Food Cards, cut as many as needed.
Book: Time to Sleep by Denise Flemming (Note: I’m sure there are better Hibernation books out there, I was not impressed with this one, it’s just all our library had in).

Optional: Have them bring a toy bear or other ‘hibernating animal’ for show-and-tell. I had them bring bears.

Introduction:
1. Read: Time to Sleep by Denise Flemming
2. Discuss: What does it mean to hibernate? What kind of animals hibernate? Why do they hibernate? Do you wish you could hibernate?
3. Explain: Hibernation is when an animal slows its body down for a long time, often during winter. Lots of different animals hibernate, not just bears: snails, skunks, turtles, woodchucks, ladybugs etc. Animals hibernate because in the winter it’s hard for them to find enough food. (more…)


Activity: If you give a kid a meat thermometer

Ari went through this phase where he insisted on turning everything into a bar graph. It was pretty random, but pretty awesome. We graphed his weight over time, the size of his toy cars, the ages of everyone he knows, etc.

While in the midst of this phase he came to me one afternoon and said “Mom, I want to do some science and make a graph, with this!” He held up a meat thermometer.

I started off by handing him 2 cups of water. One that had been microwaved, the other straight from the tap. I told him to measure the two and see what their temperatures were. He did. Then he wanted to graph them. He then proceeded to measure the fridge, cupboard, yard, plant soil, etc. Each time coming back to me for help plotting it on his graph. He had to wait 2 minutes in between each “experiment” and had to let the thermometer sit for 2 minutes to “run the experiment”. This kept him busy for a good hour while I cooked dinner… which as you can tell from experiment #5 involved chicken. (Sorry, had I know I would be sharing this I would have written a little more legibly).

He felt like a real scientist. He was so giddy.

It also allowed us to discuss things like “why is the backyard warmer than the front yard”, “why is your mouth so warm”, “what temperature keeps things frozen” and other important ‘scientist’ topics. And you know what the big ahaa moment was for him? The van was colder than the refrigerator!! Oh. My. Heck.

We plan to take the meat thermometer on our next bike ride… I’m sure he’ll think of all sorts of things to measure, and we’ll have fun comparing the results to our inside graph.

Next time your child is pining at you for something to do while you cook dinner, hand them a meat thermometer.


Helping Your Child Choose a Science Fair Project

Imagination is more important than knowledge. For knowledge is limited to all we now know and understand, while imagination embraces the entire world, and all there ever will be to know and understand.  –A. Einstein

First of all, I must confess, I’m quite the science fair savant.  I had an 11 year career while in public school with projects like dissecting owl pellets, measuring the respiration rate of crickets, conducting experiments to see what color honey bees prefer, etc.  I even spent all three years of high school studying a weevil that at the time was undescribed; a project that took me to the International Science Fair, twice (insert back patting here)!

Why Participate in Science Fair?

Some kids had sports Dads; I had a science fair Dad.  My motivation wasn’t necessarily that I loved science. Initially my motivation was that I got to spend time with my Dad.  Every spring we would plot and plan my project, conduct my experiments, gather and analyze the data…

I’m sure there was some moaning and groaning in there somewhere, but looking back those are some of my fondest memories. I truly believe the science fair is one of the best ways to get involved in your child’s education (and by involved I mean taking on the role of guide and mentor; not active participant).

Believe it or not, children are naturals when it comes to the skills needed to excel at a science project.  They’re observant, curious, creative, unconstrained by what they think ‘should’ happen, passionate, and easily excited (Eureka! moments are not hard to create).  The ‘science’ of a science project isn’t in the subject matter; it’s in the process.  The textbooks call this process the scientific method, which is really nothing more than a simple but effective way of thinking.

The hardest part is helping your child come up with a project, something they would be interested in that hasn’t been done hundreds of times (my niece actually brought home a note last year discouraging “volcanoes”). This is really just as easy as asking a question.

Note: While we have included the major parts of the scientific method, the intent of this post is primarily to help you get started on a project. For more information on the actual process I would highly recommend this Project Guide, specifically the “detailed help for each step” section just below the visual.

Step One: Ask a Question

To do this, help them recognize when they’re making an observation that can be turned into a question. Make note of things that seem to always happen together, or things that appear to have a pattern to them (children do this daily—they just aren’t usually aware that this is where science begins).   For a science fair project help them center their brainstorming around things they are interested in and familiar with:

  • Have you noticed that most things you bake in the oven have eggs in them?
  • Did you see all those bugs fly out of the flower bed when we were there?  I didn’t see as many in the gravel…
  • Why are there always so many wasps at our barbeque?
  • Isn’t it interesting that scotch tape is never used by dad when he’s jimmy-rigging something?  It’s always duct-tape.
  • Have you noticed that the rose bush has yellow blossoms and white blossoms on it?  I swear mom waters them with the same stuff every day.
  • What do you think would happen if we didn’t put our food in the refrigerator?

Each of those observations can be followed by the simple musing:  I wonder why…. And any kid will follow that immediately with: What do you think would happen if… And now you have a science fair project.

Step Two: Construct a Hypothesis

This is really just an educated guess at the answer to your question. You must state your hypothesis in a way that you can easily measure, and of course, your hypothesis should be constructed in a way to help you answer your original question. “If _____[I do this] _____, then _____[this]_____ will happen.”

For example, say you settle on the question: What do you think would happen if we didn’t put our food in the refrigerator? (more…)


  • WELCOME

    I'm Lindsey. I'm an environmental educator, my husband's a biologist. The outdoors is infused into everything we do; which explains why I'm better at mud pies than home decorating. More About Me

    I don't blog alone! Meet outsidemom contributer Olivia
  • KEEP IN TOUCH

  • PROUD TO SUPPORT

  • ACCESS ARCHIVES