Discovering the inner artist: tricks for bringing out the creative child.
This weekend my husband and I headed to the local art museum. There was a gallery featuring artwork by the local high school students. Incredible. Even the pieces missing symmetry or the ‘perfect’ level of shading impressed me. The effort. The thoughtfulness. The unique perspective of each student manifested as creative license in each piece.
I thought of my own daughter and wondered how in the world I would ever be able to encourage the artist in her, considering my lack of formal artistic training. It’s one thing to teach your kid how to glue construction paper and glitter and popsicle sticks together, but it is another beast altogether to teach a child to recreate, on paper, with a pencil, the world around them.
Naturally, I turned to my mother for guidance. How do you teach a kid to draw when the whole idea intimidates you? I grew up watching her draw–for fun, to earn some extra money, and with us. She somehow managed to be encouraging even while she carefully corrected us. She taught us to forgive ourselves when our drawings didn’t look like we thought they should. She taught us to try again, because trying again was fun. I remember drawing with her so clearly, but I don’t remember her technique–how did she teach us to embrace the challenge of recreating something on paper?
She agreed to write up her thoughts on the subject to share with you all…

 It is a common misconception that children need to be taught to draw. But really! They don’t need someone to show them how to make a mark. They love to make marks—on walls and floors and brothers and bellies. I can’t remember a time that I didn’t have a pencil in hand, but it wasn’t until I was in my 30’s that I learned how to “draw” in spite of countless hours and a small fortune invested in lessons. Soon after, I started teaching at my daughter’s elementary school as a volunteer. What I discovered is this: Teaching children to draw means first teaching them to see and teaching them to see means giving them permission to ignore the symbolic world of our educational system. There’s nothing wrong with symbols: this post would mean nothing to you if you had not mastered symbology (i.e. letters) in school. But when it comes to drawing, I find that spaces, lines, texture, hue, saturation and color are much more interesting than symbols.
What follows is drawn (sorry!) from the excellent book, “Drawing on the Right Side of the Brain” by Betty Edwards. I can’t cover all of the material in the book in this post, but I highly recommend you give it a read. . I can assure you that it will unlock your child’s inner artist—and maybe yours as well!
It’s fortunate that this is a blog about the outdoors, since nowhere else are a child’s creative urges more stimulated than in the natural world. There are no symbols in the natural world. Every subject in nature willingly gives itself over to creative interpretation. Natural subjects aren’t annoyed when they are drawn with double chins, or with noses too big or lips too small; and the level of effort on the part of the artist is a matter of whim, not constrained by the clock. I’ll leave drawing theory to Betty Edwards, but the modified exercises that follow will make more sense to you if you understand the theory behind them. Give the following exercises a try to get your budding artist started. (And I need to state that these exercises will be so much more effective if you and your little ones are all doing them together. There will be some pretty silly images; if they can see you laughing along with them at what is most certainly going to be an “artistic” failure, they will be more likely to dismiss their own fear of failure and have fun.)
You will need to judge when to start and how fast to move through the exercises. I recommend you wait to start lessons until stick figures aren’t good enough anymore and your child asks you how to draw _____ (fill in the blank). This transition from drawing at will to learning to draw can be tricky because children are by nature impatient and by the time they are asking how to draw a subject, they will know about symbols and will assume that they need to know how to make the symbol that represents a subject. You will need to use your mother’s intuition to get things started. With many of these exercises the initial goal is not to create an image that immediately looks like a prancing buck or a fine botanical illustration–the point is to learn to truly see. Once an artist has learned to see everything, there is no limit to what can be represented on paper!
I also recommend that they be allowed to stop when they lose interest.
Supplies:
Paper. Newsprint pads are a good choice because they are large and cheap.
Pencil. A plain old #2 pencil is fine for older children. Crayons or markers are good for smaller children.
Eraser. Erasing is fine, but won’t be needed for exercise #1. If your little student gets too carried away with erasing, move back to blind drawing for a while.

Practice truly seeing the subject–not the symbol.
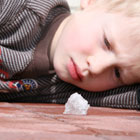
1. Blind drawing: Use a drawing surface that can be steady on its own—like a table, an easel, or a stool. Tape a piece of paper to the surface. Choose a subject—the simpler the shape the better. At least for the first drawing, a stone is a better choice than a pine cone; a stick is a better choice than a maple leaf. Have your child sit so that the subject is off to the side and behind the paper far enough that sneaking a peek at the drawing surface is difficult (i.e., they would have to turn their head to look at what they’re drawing). The challenge is to draw the subject by ONLY looking at the subject, never at the drawing, and by NEVER lifting the pencil from the paper. The objective for your child is to draw every detail that they see. This exercise is good because it encourages paying attention and because it is impossible to be “wrong.” The purpose of the lesson is to learn to focus and pay attention to small details, in other words—to see. Younger children will have a very short attention span, so simple is critical.
Afterward, look at the drawing with them and remark on any detail in the drawing that reflects paying attention to the subject. If you can get them to pay attention long enough, do this several times in a row. Encourage them with each iteration to see more detail. Part of the value of this exercise is to make the shift from symbolic consciousness to immersion in observation, a skill that’s natural to children.
")
Notice the Little Details
2. Mirror Drawing: Modify the blind drawing exercise to allow peeking. A good subject for this second lesson is your student’s non-drawing hand, since it is so close. Same story–with emphasis on drawing every detail without lifting the pencil from the paper… and while they are allowed to peek at the paper, focusing on the subject is best. Share your drawings and see if you can link the little curves and angles in the drawing with details in the subject. Your child may be dismayed that the drawing doesn’t look just like their hand. Congratulate them on the little details and remind them that ‘success’ here is measured by not lifting the pencil and by seeing details, not by representing a hand.


Now take that drawing and cut away one segment so that you are looking at just one part of the whole drawing (to start, chose the simplest part). Since it is just one part, the tendency to symbolize the object is thwarted. Using just the first line as a pattern, draw a mirror image of it. Make it fun; even if the two are not true mirrors, there will be some detail to remark about. Again, have fun with the designs and patterns that emerge and keep them focused on noticing the details.
It’s Okay to Trace.
3. Tracing: We are all taught that tracing is cheating, but that’s not true. Tracing is an excellent way to create muscle memory. Seeing the line and replicating it requires very finely tuned eye/muscle coordination–tracing is a good way to lay this down. For this exercise, you will need a line drawing of something recognizable. A page from a coloring book works well if the image is fairly simple. Have the children trace the drawing three times: The first time, turn the picture upside down for the tracing. The second time, they can’t lift their pencil from the page. Ask them to see if they can do it without drawing over their lines (the secret is to start with the outer edge and work in a circular fashion to the center). The third time, have them draw only the spaces between the objects in the picture. This brings us to negative spaces.
Learn to Draw Everything–Except the Subject.
 4. Negative Spaces: Negative spaces are the empty areas around the subject. In terms of artistic composition, negative spaces are one of the most important elements of a drawing. As an example, consider the Rubin vase; the subject is a vase, but in the negative space (the white area of the image) are two opposing faces. But before your little artists can begin using them for composition, they have to learn to see them. One of the values of learning to see negative spaces is that it forces your brain to stop seeing the symbol–the object that occupies the positive space. For this exercise, use natural objects arranged on a piece of colored paper. It is important at this point to use the paper to create an outside boundary–the negative spaces on the outer edges are easier to see with a boundary. Sticks, leaves, and rocks are good choices. String coiled on a sheet of paper also creates nice negative spaces. Cover most of the paper with these items, so that there are only one, two, or three spaces where the colored paper shows through.
 around the leaves and sticks")
 The exercise will be to draw the non-subject space—the space that is open between the objects. Talk about looking for round parts and angled parts; have them use comparisons to get better shapes (this line is shorter than this one, the space is wider than this line). Compare drawings and remark on the shapes that are closest to the real space.
Now remove a few more objects and open up a few more spaces. Either add them to the drawing or start a new drawing. Again, with each iteration, remark on those spaces that are true to form.
Keep removing objects and drawing spaces. At first the spaces will be just spots on the paper, but as you remove items and the spaces become bigger, the “space” between the spaces will start to look like leaves and rocks and sticks (see pictures below, with a few more objects removed.)


Seeing it all–lines and spaces
5. Upside-down Drawing: This is the most complicated exercise. You will need to judge if your child is ready for this. Using the same image you used in exercise #3, turn the image upside down. On a clean sheet of paper, ask your artist(s) to draw exactly what they see. The finished drawing will be upside down. Ask them to look for spaces and to pay attention to details. They (and you) will be surprised at how closely they have been able to replicate the image. Try it again with a more complicated image, At this point, stick to line drawings–nothing with dark and light or shadows. Again, the point is to force the mind to see an object as it is, not as the symbol it has been trained to think it should see. When a familiar image is upside down, it is harder for the brain to associate it with a preconceived notion of how that object ‘should’ look.
Putting it all together.
6. A drawing for the portfolio: It’s now time to put it all together. For the final drawing, use a fairly simple object, with spaces and lines. A chair is a good choice because it has well-defined lines and angular spaces; or give them a mirror and have them draw their own eye. Other options are piles of rocks, a leaf, a flower.


 (Hint: to help them see the negative spaces around the outside of the object, teach them to use their hands to create a picture frame.)
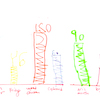
Give the students as along as they need to draw the object. Encourage them to remember what they learned about drawing spaces between lines. Even if the drawing is not an exact replica of the object, pull out the parts of the drawing that show attention to detail. Compare the final product with their earlier attempts at symbolic drawing. Celebrate success! Remember, even if the drawing is not worthy of the Metropolitian Museum of Art it IS a success.
From this point, it is likely they will be drawing all the time. Experimenting should be encouraged. In school, they will be encouraged to practice symbolism because it can be standardized to all skill levels, but this isn’t a bad thing if they have the opportunity to let go and draw what they “see” outside the classroom. Whether or not your students become artists in the commercial sense, they will be have begun to develop an important naturalist skill–the ability to “see.”
Related Articles:

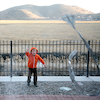
 Capture the Flag. The best place I’ve ever played this game was in a sandy wash with sorta steep sides. In this beloved game, each team hides a flag on their side of the wash, or field, or dirt road. Team members strategize to sneak over steal the other team’s flag without getting caught while also guarding their own flag against capture. More info on


 So Stacy Tornio sent a copy of her (and Ken Keffer’s) new book to me a few weeks ago. I’ve been reading through it ever since. So many ideas (448 to be exact)! So well organized!
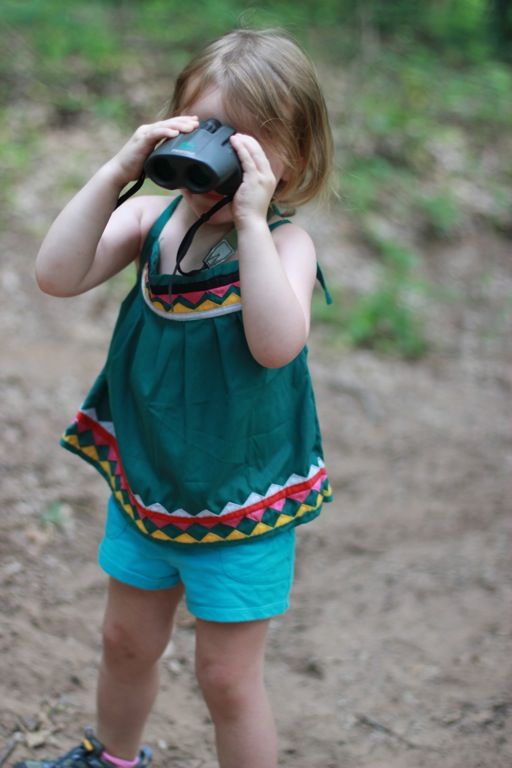 Binoculars Whether it’s to view the night sky or the moon, magnify a spider (turn your binoculars upside down), or check out the birds in the trees above camp, binoculars are a great addition to any bag of camping goodies. With adult supervision, any pair will work or you can buy your kids their own pair fairly inexpensively. Look for ones with low magnification, wide field of view, not too heavy or consider a pair specific to kids. I’ve been drooling over these
 Portable microscope or magnifying glass Dissecting microscopes are great for viewing the smaller of nature’s creatures. No slides or cover slips required. If you get a
 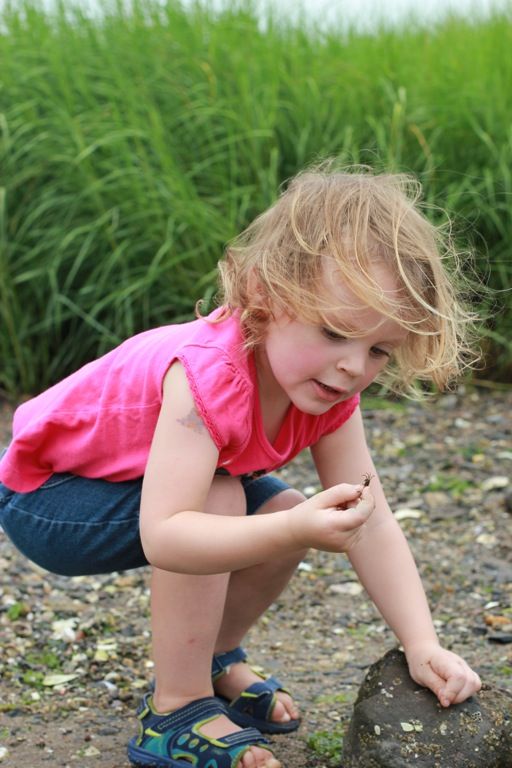 nough for even young campers, and are a great way to teach gun safety with little danger of someone getting hurt. Set up a paper plate in a bush with a good back-drop, and bring some markers to keep track of who fired where. For added fun, set up some animal crackers on a distant hill and go ‘big game’ hunting. Teach your kids about the difference between shooting squirrels for fun and shooting a deer for meat while you’re at it.
 Browse the links, look at the flowers, and be inspired to take a walk outside this weekend looking at nature’s short-lived gems! Depending on where you are, bring a


 What advice would you give Moms who want to start doing this with their kids?


 As I mentioned


 I’ve had writers block before, but nothing like this.


 I have to say, I really do think Ari learned a lot from this little experiment, and we had a blast doing it! My only regret is that the science fair is right smack dab in the middle of winter here, which makes thinking of outside projects a little harder. If I had my way, the science fair would happen in the summer when your kids are home and looking for something to do. We just might be that overachieving family who has their project done before the school year even starts next year.


 A few weeks ago I had a Chaco shoe giveaway on my blog and asked people to enter by telling me: “What is the one outdoor baby/child item you wouldn’t want to live without.” The item that claimed the first prize?

 About a week ago I came down with a terrible case of bronchitis. Every pregnant lady I know tells me that you get sicker when you’re pregnant. I concur. I haven’t been that miserable in a decade, at least. What’s worse is all the cold medicines you’ve been saving since your last bout with a cold are useless. Robitussin? According to the FDA: pregnant women should only take it if the benefits outweigh the risks… and by the way we have no idea what the risks are. Tylenol? Sure. In small doses and do not under any circumstances exceed the maximum dose. Which means if your fever starts coming back around hour 3.5, you are just going to have to suffer until hour six to eight before you can get some relief again. Nyquil? No. Sorry.


 Because we will be off celebrating the holidays with our families this next week, we leave you with a list of our top 12 blog posts of 2012. Some were chosen because they were so popular with our readers, others because they were our favorites. I’m also sharing a few photos that really helped define this past year for us.


3 Comments so far
Comments Feed
Thanks! I loved this post! I will be using some of these activities with my kids. Great ideas. 🙂
Thanks for this. My 6-yr-old spends all of her free time drawing and doing art projects and I needed some ideas like these!
Great Summer, glad we could be of some help!